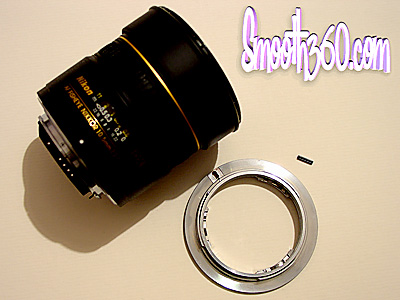
 The items needed. Lens, Adaptor and Roll Pin. |
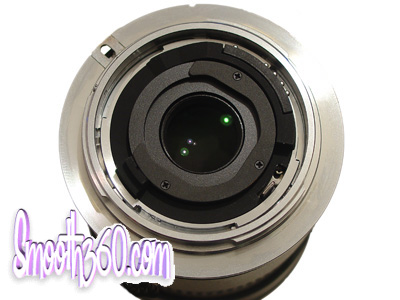 Here you see the adaptor fitted to the Nikkor 10.5mm Fisheye |
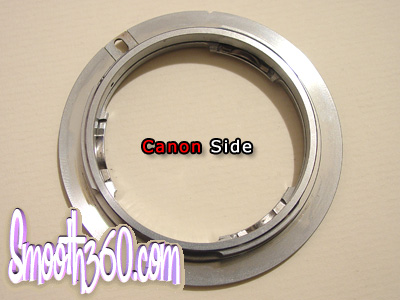 This is the side that mates to the Canon body |
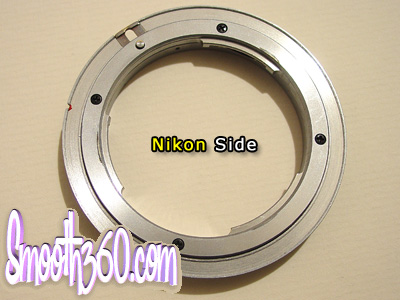 This is the side that mates to the Nikon lens |
|
This brings us too the need for some useful thinking. As the lens has a clearly visible sliding lever.
As this movie shows from F/2.8 to F/22 |
From closed (F22) to fully wide open (F2.8)
|
It seemed to me that if we could move the aperture lever whilst on the camera most issues would be solved. Now, after searching the web I found some other panographers had made some worthwhile attempts and by in large they were onto the right idea but I thought a little more permanent version would be a better idea for my needs. The trick is too make these modifications without doing any modification to the expensive Nikkor lens. Meaning "all" mods would have to be to the Fotodiox adaptor. Seeing as the aperture lever is spring loaded I figured that we only need to push the lever and not have to pull the lever making it easier than I first imagined. This got me thinking about tiny little "roll pins" so I went shopping and found a very strong spring steel 1.77mm x 8mm roll pin readily available at the local nut and bolt supply shop. Being 1.77mm in diameter and compressible it was realised that the hole needed would be 1.5mm to give it a nice tight fit. The theory is/was to drill a hole in the correct position of the Fotodiox adaptor and tap the roll pin into place so it would push against the aperture lever whist turning the (complete) lens on the Canon camera. |

This image shows the approximate position needed
|
Great care should be taken to make 100% sure the position is correct. I determined this by making sure the adaptor lock button was locked into the Nikkor lens and then pushing the aperture lever to the full wide open position (F/2.8) then using a permanent marker I placed a dot in line to where I would need to drill the 1.5mm hole so I could place the 1.77mm x 8mm roll pin in place. Once the position is marked and you are totally sure it is the right place go ahead and using a small but sharp centre punch indent the position to be drilled. Using a cordless drill on "slow" I used a brand new 1.5mm drill bit to drill the required hole and then using some pointy (needle) nose pliers held the 1.77mm roll pin and tapped it into place being sure to go all the way flat and level with the adaptor ring groove. I then paid special attention to any clean up required with a small (tiny) file and a soft clean rag. |
Roll pin in place and in action on the Nikkor lens
|
You can clearly see this works like a charm and fitting to the lens was non restrictive in fact the adaptor ring fits exactly the way it did before the modification. If you have positioned the roll pin in the correct position when you twist the adaptor on the lens the button lock should activate when the aperture lever is fully wide open at (F/2.8) Now, one last modification is required so you can use the lens with the added advantage of manual on camera aperture control. The button lock I have just spoken about needs to be ground flat so it's locking ability is removed. I used a Dremel Multipro tool with a grinding stone in place and simply ground it flat the adaptor ring face. |
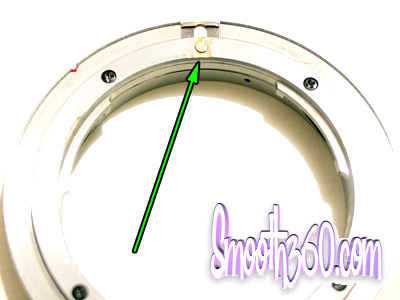
The arrow shows that the button has been
ground flush to the face of the adaptor.
|
Fitting to the camera is now straight forward and all we now need to do is ascertain where our favourite F stop is located. For me I have a liking for F/11 using the Nikkor lens on the Canon body. So what I did was place my Sigma 8mm Fisheye on the camera and set it to F/11 and set and take notice of the shutter speed required. Having noted this, I then removed the Sigma 8mm and replace it with the Nikkor 10.5mm and knowing what the shutter speed was on the Sigma 8mm I adjusted the Nikkor 10.5mm by rotating the lens (manual aperture) until it match that of the Sigma 8mm. NOTE: This will not be totally accurate and field testing will prove if I need to adjust in either direction. Of course this is now very simple. Preliminary test via the histogram prove that I'm definitely on the right track here. |
I use the adaptor "Red Dot" as my marker.
The centre position shown is F/11 and the others
F/2.8 and F/22.